 |
MyroC Installation and Comments for Mac OS X
Materials to Support a C-based Course with
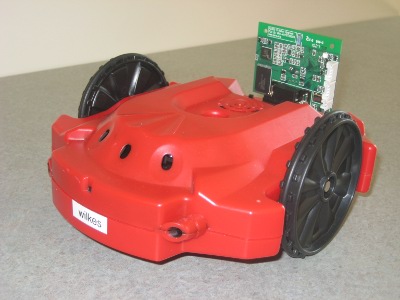
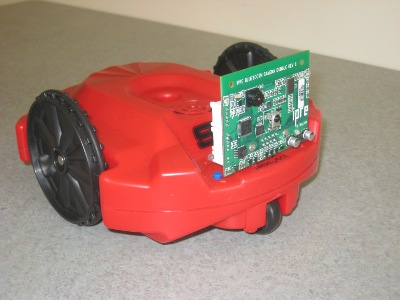
Scribbler 2 Robots
|
 |
|
|
MyroC Installation and Comments for Mac OS X
Materials to Support a C-based Course with
Scribbler 2 Robots
|
|
|
This page organizes instructions and notes for the installation of
version
Warning: Undefined variable $_MyroC_version in /home/walker/public_html/MyroC/macintosh/myroc-installation-notes-mac.php on line 48
the MyroC package on Mac OS X.
| eSpeak (external package) | libjpeg (external package) | openGL (part of Mac OS X) | eSpeakPackage.2.0
(within MyroC.b) | MyroC.b |
Extensive testing of MyroC has not revealed any errors on many Mac OS X environments:
That is, at present, there are no known errors
in rDisplayPicture or any other MyroC functions when
running MyroC on Mac OS X 11.15 (Catalina) or earlier Mac OS X
releases. Further, no errors are known on more recent Mac OS X
releases running on Intel processors.
When using the MyroC package on Mac OS X 11 (Big Sur) or Mac OS X
12 (Monterey) on M1 processors, the
rDisplayPicture function does not work at the present
time. Instead, when the function is called, several error messages
are reported, and processing continues after the call to
rDisplayPicture. That is, a call to this function
on M1 processors generates error messages and no image
appears in a window, but subsequent processing still continues.
Also, the experience using the rSavePicture and
rLoadPicture on Mac OS X 11 (Big Sur) and Max OS X 12
(Monterey) on the M1 processor seems inconsistent.
Wrong JPEG library version: library is 80, caller expects 90
If you encounter this difficulty, contract Henry Walker, walker@cs.grinnell.edu, reporting the error message. With some dialog, the problem likely can be identified and solved.
Partial Workaround—when rSavePicture
works: Although rDisplayPicture does not work on
Mac OS X (Big Sur) and Mac OS X (Monterey) on the M1 processor, a
program still can utilize MyroC to download images from a Scribbler
2 camera, create and edit images, save images to a file in jpeg
format, and load those images. With these capabilities, a user
wishing to work with images from MyroC could proceed in three steps:
rSavePicture to create a file containing the
image in jpeg format.
In what follows, all commands are assumed to be executed in a terminal window.
A user has wide latitude regarding directories for downloading and processing files. For simplicity, the user might consider creating a "MyroC" directory (perhaps within the user's home directory) for work related to the MyroC download and installation.
mkdir MyroC
Several of the following steps utilize the sudo command, run in a terminal window. The sudo command allows a user to run certain, authorized commands (e.g., system commands) without having general administrative privileges.
For example, one step in the installation of the eSpeak speech synthesizer requires a copy of the speak program to be placed in the /usr/local/bin directory. Once the speak program has been downloaded, a natural command might be
cp speak /usr/local/bin
However, the /usr/local/bin directory is owned by the system administrator for the computer (sometimes called "root"), and a normal user cannot make changes in this directory. Thus, the user would type
sudo cp speak /usr/local/bin
With this command, the system will ask for your password for authentication. If you type your password correctly, and if you are authorized for this command, then the system will perform the desired work, and the speak program will be copied as you wished.
The eSpeak package by Jonathan Duddinton provides a foundation for the use of a speech synthesizer within programs utilizing MyroC. The underlying motivation is that testing programs involving robots involves two basic elements:
In practice, watching both code and the robot at the same time is challenging, and a good solution involves replacing the code observation task with code-generated statements that speak what is supposed to happen. With this approach, the speech generator tells what is supposed to happen, and one can hear that while watching the robot.
Although the use of this eSpeak speech synthesizer turns out to be reasonably straight forward within programs to control robots, the installation of eSpeak depends greatly upon the specific version of Mac OS X present on one's computer. Thus, the directions that follow are divided into categories:
On Mac OS X High Sierra and earlier, installation of eSpeak requires only a few steps. The basic approach uses proceeds as follows:
In this outline, the downloading process is the same for all Mac OS X versions from High Sierra or earlier. However, with Mac OS X El Capitan, Apple changed its file-permission policies, and this change requires moving the program and data to different directories in earlier versus later Mac OS X versions.
For any Mac OS X version from High Sierra or earlier, the downloading steps and the copying of the binary program are the same to install eSpeak:
Download eSpeak OSX zip file from eSpeak
If the Downloads package appears with a .zip extension (e.g., espeak-1.45.04-OSX.zip), unzip the OSX zip file:
Move to the unzipped espeak directory, and review the available files, including the license and ReadMe files.
cd espeak-1.45.04
ls
more License.txt
more ReadMe
Within the espeak directory in a terminal window, copy the speak program to /usr/local/bin.
sudo cp speak /usr/local/bin
For Mac OS X Yosemite release (Mac OS X 10.10) and prior releases, user files may be installed in /usr/share, using the command:
sudo cp -R espeak-data /usr/share
Note: this location is required by the speak program — since speak is a binary executable, changing this location is difficult or impossible
For Mac OS X El Capitan through Mac OS X High Sierra, Apple does not allow user files to be stored in /usr/share for security reasons. However, the espeak program requires data stored in this location, and this cannot be easily changed. Thus, some creativity is needed.
sudo mkdir /usr/local/share
sudo cp -R espeak-data /usr/local/share
cd     # move to user's home directory
ln -s /usr/local/share/espeak-data espeak-data
As noted above, the eSpeak project by Jonathan Duddington provides a binary file containing a complete program for use as a speech synthesizer.
The bad news: This downloadable binary espeak program was compiled for 32-bit computers, and Mac OS X Catalina will only run programs compiled for 64-bit machines (likely for security reasons).
The partially-good news: Duddington's eSpeak project also provides source code that can be compiled to create one's own eSpeak program. Even with this positive capability, however, the actual source code is designed for a Linux environment, and several changes must be made for this code to compile and run on Mac OS X Catalina.
The good news: As the MyroC Developer, I have downloaded the relevant source code from Duddington's eSpeak project, edited the code to run on Mac OS X Catalina, and provided revised code that can be compiled and run for use within a 64-bit environment.
With modest apologies for the work required, the overall effort to create an appropriate environment for Duddington's eSpeak proceeds in two basic steps.
The steps that follow first outline several approaches to handle PortAudio and then provide instructions for the modified eSpeak program.
Depending upon other applications that may already be installed on your machine, the PortAudio sound interface may already present.
Search your computer for the PortAudio application, by opening a Terminal window and typing the line
find / -name "*portaudio*" -print 2> /dev/null
          /usr/local/include/portaudio.h
          /usr/local/lib/libportaudio.a
          /usr/local/lib/libportaudio.dylib
If some path names are reported, you will know that PortAudio already is available, and you can skip the rest of this section on installing PortAudio and move ahead to the instructions for compiling and installing the 64-bit eSpeak package.
find command does not report any
files, you will need to install PortAudio. In practice, this
can be done with tool Mac Ports, with tool Homebrew, or with basic
Terminal window commands.
port install portaudio
Note: If this command produces a permissions error,
try adding sudo as described in the General
Comments at the start of these instructions.
brew install portaudio
Note: If you use brew and the above line fails, the following sometimes seems to fix the problem:
              brew uninstall portaudio
              brew install portaudio --HEAD
./configure && make
However, if the above command yields a permission error, adjust the above line to
./configure && sudo make
In this step, you will need to determine a directory in which to download the espeak package from Jonathan Duddington, as modified for Mac OS X Catalina. Although any reasonable directory likely could be used, these instructions assume you will work within a Downloads directory.
Download compressed file espeak-1.48.04-rev-for-mac.tar.gz to your chosen directory (e.g., Downloads).
In a terminal window, move to your chosen directory:
      cd           # in case earlier commands have been done in other directories, go home first
      cd Downloads # move to your chosen directory for eSpeak installation
Although the downloaded file, espeak-1.48.04-rev-for-mac.tar.gz, is a compressed archive file, Mac OS X may have decompressed it during the download process.
tar -xzvf espeak-1.48.04-rev-for-mac.tar.gz
tar -xvf espeak-1.48.04-rev-for-mac.tar
Move to the newly-created directory espeak-1.48.04-rev-for-mac
cd espeak-1.48.04-rev-for-mac
Upon decompression, the downloaded directory contains numerous files, including the following.
Edit the first lines of Makefile-speak-prog to reflect local directories used for this application
Note: If you do not know (or have not recorded) the location of the PortAudio materials, search your computer for this information by typing the following line:
find / -name "*portaudio*" -print 2> /dev/null
Compile the speak package
make -f Makefile-speak-prog
Install the speak package
sudo make -f Makefile-speak-prog install
As with several earlier Mac OS X versions (10.11-10.4), Mac OS X Catalina (10.15) does not allow user files to be stored in /usr/share for security reasons. However, the espeak program requires data stored in this location, and this cannot be easily changed. Thus, some creativity is needed.
sudo mkdir /usr/local/share
sudo cp -R espeak-data /usr/local/share
cd     # move to user's home directory
ln -s /usr/local/share/espeak-data espeak-data
The eSpeak project was developed originally by Jonathan Duddington. A new branch for an updated espeak-ng.was begun in 2010 by Reece H Dunn. Whichever of these is used to support eSpeak, it relies upon the PortAudio sound interface.
Using Mac Ports or Homebrew, complete installation of eSpeak can be reasonably straight forward.
Search your computer for the PortAudio application, by opening a Terminal window and typing the line
find / -name "*portaudio*" -print 2> /dev/null
          /usr/local/include/portaudio.h
          /usr/local/lib/libportaudio.a
          /usr/local/lib/libportaudio.dylib
If some path names are reported, you will know that PortAudio already is available, and you can skip the rest of this Step 1.
find command does not report any
files, you will need to install PortAudio. In practice, this
can be done with tool Mac Ports or Homebrew.
port install portaudio
Note: If this command produces a permissions error,
try adding sudo as described in the General
Comments at the start of these instructions.
brew install portaudio
Note: If you use brew and the above line fails, the following sometimes seems to fix the problem:
              brew uninstall portaudio
              brew install portaudio --HEAD
With PortAudio installed, eSpeak may be installed with either Mac Ports or Homebrew, following commands analogous to those use for PortAudio:
port install espeak
or
brew install espeak
Once eSpeak is installed, run the following command and
record the complete path (with directories and file) for
the installed espeak program.
find / -name espeak -print 2> /dev/null
(This will be needed later on, when installing the eSpeakPackage related to MyroC.)
After running "brew install espeak", if the terminal
returns "Error: Cannot install under Rosetta 2 in ARM default prefix
(/opt/homebrew)", run
arch -arm64 brew install espeak.
espeak << !
this is a test
!
Notes:
Procedures to install the jpeg library depend upon the version of Max OS X running on your machine.
Download the jpeg source from www.ijg.org to /usr/local/src:
cd /usr/local
sudo mkdir src
cd src
In a browser, go to http://www.ijg.org, home for the Independent JPEG Group, to verify the current stable version of the jpeg library. At this writing, the current version is release 9a, and that version is used in the following instructions. (When later releases become available, you will need to make the corresponding adjustments in what follows.)
Download compressed jpeg source code:
sudo curl --remote-name http://www.ijg.org/files/jpegsrc.v9a.tar.gz
Extract and decompress the downloaded file, creating a new subdirectory
jpeg-9a
Still working within directory /usr/local/src:
sudo tar -xzvf jpegsrc.v9a.tar.gz
Compile and install libjpeg from new jpeg-9a subdirectory
cd jpeg-9a
sudo ./configure
sudo make
sudo make install
Notes:
As with the eSpeak package, the installation of a jpeg library on Mac OS X 11 (Big Sur) requires the use of either Mac Ports: or Homebrew.
If you are using Mac Ports:, install a jpeg library with the command:
port install jpeg-turbo
If you are using Homebrew, install a jpeg library with the command:
brew install jpeg-turbo
Since OpenGL is used widely as the underlying environment for Mac OS X, this package already should be available within the Macintosh environment.
Since it is already installed as part of Mac OS X, a user need do nothing to complete this step.
As noted in the General Comments near the top of this page, the following procedures assume the user has established a base directory for the downloading and installation of the eSpeak and MyroC packages. For example, the user might create a base directory, perhaps called "MyroCPackage".
In a terminal window, move to the created base directory, with a command such as:
cd        # since earlier commands reference various directories, go home first
cd MyroC  # base directory for MyroC installation
Download the compressed archive file, MyroC.b.tgz to your created base directory
Although the original file, MyroC.b.tgz, is a compressed archive file, the Mac environment may or may not decompress the file automatically during download.
tar -xzvf MyroC.b.tgz
tar -xvf MyroC.b.tar
All materials for the eSpeakPackage are (not surprisingly) located in
the eSpeak directory.
Move from the general MyroCPackage directory to its
eSpeak subdirectory.:
cd eSpeak
The internal algorithms and code for the eSpeakPacakge are quite different on Linux, Mac OS X, and Windows 10. Thus, the downloading and decompression process for the MyroCPackage creates four subdirectories for the eSpeakPackage:
eSpeakExample1.c works directly with just the
eSpeakPackage. The other C programs, however, utilize both the
eSpeakPackage and MyroC, so they cannot be used until both of
these elements have been installed.)
Assuming a Mac environment, move from the main base directory to the new MyroC.3.1 subdirectory, and the mac-based eSpeak directory. Then list the contents of the eSpeak subdirectory:
cd                    # go home first
cd MyroCPackage       # go to base directory for the MyroC/eSpeakPackage infrastructure
cd eSpeak
cd eSpeakPackage-mac.2.0
ls
The listing includes the following files:
On Mac OS X 11 (Big Sur) / Mac OS X 12 (Monterey) with M1 Processors Only:
Edit Makefile-mac, changing the assignment to
variable CC (about line 17) to
CC = clang
Designate Makefile-mac as the relevant framework for compiling and running eSpeak on a Macintosh computer. This is accomplished by creating a symbolic link within the eSpeak directory:
ln -s Makefile-mac Makefile
After this command has been issued, use the ls -l command to check that a new Makefile entry appears in the subdirectory, and that it points to makefile-mac:
ls -l
If this link command ln -s generates a "file exists"
error, then a current Makefile link exists, but it may be
designating a Makefile for Linux or Windows, rather than Mac. In
this case, remove the earlier link and create a new link:
    rm Makefile
    ln -s Makefile-mac Makefile
Check the location of the speak program (installed
above) by typing the command:
find / -name espeak -print 2> /dev/null
espeak program is not found, go back to the earlier
instructions to install epeak/eSpeak.
espeak is located in
directory /usr/local/share, continue to the next
step (Step 7).
espeak is located in a different directory,
edit the espeak_program variable
in eSpeakPackage.c (approximately line 32) to
specify the full path name for the espeak program.
For example, if you used Homebrew with Mac OS X 11 (Big Sur) to
install the third-party eSpeak package, then this full path is
likely to be
/opt/homebrew/opt/espeak/bin/espeak
Compile the eSpeakPackage
make eSpeakPackage.o
sudo make install/eSpeak
Notes:
ls /usr/local/include
sudo mkdir /usr/local/include
After compiling the eSpeakPackage (step 5), both programs eSpeakTest.c and eSpeakExample1.c can be compiled and run:
make eSpeakTest
./eSpeakTest
make eSpeakExample1
./eSpeakExample1
Note that eSpeakExample2.c will not compile correctly until the MyroC package also is installed; other programs should compile without trouble.
Installation of the eSpeakPackage required downloading and decompressing the archive file MyroC.b.tgz. From the created base directory (e.g., "MyroC"), move to the MyroC.3.1 release subdirectory, and then its subrelease MyroC.b subdirectory:
Move to the MyroC.b subdirectory:
cd            # since earlier commands reference various directories, go home first
cd MyroC      # base directory for MyroC installation
cd MyroC.3.1  # the release subdirectory
cd MyroC.b # the subrelease subdirectory
On Mac OS X 11 (Big Sur) / Mac OS X 12 (Monterey) with M1 Processors Only:
Three adjustments are required for file Makefile-mac:
CC (about line 56) to
CC = clang
-L/opt/homebrew/opt/jpeg-turbo/lib to the
LDFLAGS variable (about line 61). The new line should be
LDFLAGS= -framework OpenGL -framework GLUT -ljpeg -L/opt/homebrew/opt/jpeg-turbo/lib
LDFLAGS
CPPFLAGS= -I/opt/homebrew/opt/jpeg-turbo/include
As with the eSpeak installation, designate Makefile-mac as the relevant framework for compiling and installing the MyroC package:
ln -s Makefile-mac Makefile
Compile and install the MyroC package in system directories:
sudo make install/MyroC
Several test programs are available in the test-programs subdirectory of the base directory.
Preliminary Step: Using MyroC with Scribbler 2 robots requires setting up Bluetooth so the workstation/laptop and robot(s) are properly paired. See Bluetooth Setup for Macintosh Workstations/Laptops for details — before trying to run test programs.
When using the MyroC package on Mac OS X 11 (Big Sur), the
rDisplayPicture function does not work at the present
time. Instead, when the function is called, several error messages
are reported, and processing continues after the call to
rDisplayPicture. That is, a call to this function
on Mac OS X 11 (Big Sur) generates error messages and no image
appears in a window, but subsequent process still continues.
Partial Workaround: Although rDisplayPicture
does not work on Mac OS X (Big Sur), a program still can utilize
MyroC to download images from a Scribbler 2 camera, create and edit
images, save images to a file in jpeg format, and load those
images. With these capabilities, a user wishing to work with images
from MyroC could proceed in three steps:
rSavePicture to create a file containing the
image in jpeg format.
Compiling MyroC programs requires use of numerous compilation flags, compiling normally uses a Makefile. As with installation, compilation flags must be tailored to the Macintosh environment.
Move to the MyroC.3.1 directory that you created earlier (not MyroC.b), and then move to its test-programs subdirectory.
From the MyroC.3.1 directory, move to the test-programs subdirectory.
cd test-programs
On Mac OS X 11 (Big Sur) / Mac OS X 12 (Monterey) with M1 Processors Only:
Three adjustments are required for file Makefile-mac
within the test-programs directory:
CC (about line 12) to
CC = clang
-L/opt/homebrew/opt/jpeg-turbo/lib to the
LDFLAGS variable (about line 12). The new line should
replace the bare-bones assignment to the variable LDFLAGS
LDFLAGS= -framework OpenGL -framework GLUT -ljpeg -L/opt/homebrew/opt/jpeg-turbo/lib
CPPFLAGS variable, which appears just before LDFLABS
CPPFLAGS= -I/opt/homebrew/opt/jpeg-turbo/include
In the test-programs subdirectory, designate Makefile-mac as the relevant framework for compiling MyroC programs:
ln -s Makefile-mac Makefile
Test programs can be compiled with a simple make command. For example, running the spirit-song.c program utilizes these steps:
make spirit-song
./spirit-song
Note: If this step generates errors that rBeep and other MyroC functions are "Undefined symbols" or that there is a "clang: error", double check that the "ln -s" command above has been issued, and a new file (called Makefile) is present in the same directory as your program. See also the notes after Step 4 below.
Process creation—for Mac OS X Catalina or later: The display of images in MyroC requires creating a new process for each window. However, in Mac OS X Catalina and later, a permissions problem prevents the window from appearing.
    make test-image-display
    ./test-image-display
export OBJC_DISABLE_INITIALIZE_FORK_SAFETY=YES
Note that this line will be needed for each Terminal window opened to run a program displaying an image.
Screen Resolution: If you are running on a Mac, you need to configure display processing for a low- or high-resolution screen.
Since many modern Mac computers have high-resolution monitors (e.g., Retina screens), the default setting is for high resolution. Regardless, to determine whether image display is configured correctly in MyroC for this machine, go to the test-proorams directory for MyroC.3.3a.
    make test-image-display
    ./test-image-display
MyroC-display-linux-mac.c. Within the code, go
to the following lines (approximately lines 235-236):
#define WINDOW_HORIZONTAL_SCALING_FACTOR 2
#define WINDOW_VERTICAL_SCALING_FACTOR 2
and change the scaling factor 2 to 1
test-image-display.
To compile programs in any other user directory (except eSpeak and MyroC.b), copy the Makefile-mac file to the user directory — using the name Makefile.
Notes: Compiling and installing both the eSpeakPackage and MyroC require different commands from compiling and running user programs (once these packages have been installed). Thus, the Makefile-mac files in the eSpeak and MyroC subdirectories are different from the Makefile-mac file in the test-programs subdirectory. Be sure to utilize the Makefile-mac in the test-programs subdirectory as the appropriate Makefile for user programs utilizing either the eSpeakPackage or MyroC.
|
created 17 October 2015 revised 19 October 2015 revised 23 February 2016 updated to include Windows 10 reference: 5 January 2021 third-party eSpeak section revised for Mac OS X Catalina and later 19-20 January 2021 revised for Mac OS X Catalina 6-7 February 2021 revised for Mac OS X Big Sur 24-26 A[ril 2021 |
|
| For more information, please contact Henry M. Walker at walker@cs.grinnell.edu. |

|
The MyroC project is Copyright © 2011-2015
by Henry M. Walker.
|