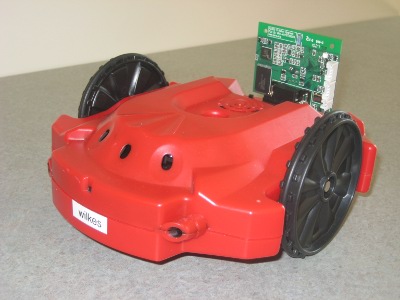
 |
MyroC Installation and Comments for Windows 10
Materials to Support a C-based Course with
Scribbler 2 Robots
|
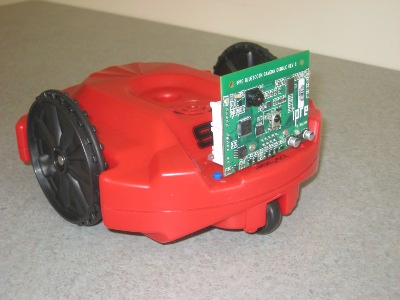 |
|
|
MyroC Installation and Comments for Windows 10
Materials to Support a C-based Course with
Scribbler 2 Robots
|
|
|
This page organizes instructions and notes for the installation of
version
Warning: Undefined variable $_MyroC_version in /home/walker/public_html/MyroC/windows/myroc-installation-notes-windows10.php on line 51
of the MyroC package on
Windows 10. Overall, this installation involves the following packages:
| MinGW-w64 and MSYS
(including several MSYS2 Packages) | eSpeak
(from developer Jonathan Duddington) | eSpeakPackage.3.0
(part of MyroC.a) | MyroC.a |
The C Programming Language was first developed in the 1970s to support software development by computing professionals at AT&T Bell Laboratories. These cutting-edge computer scientists often worked within an operating system called Unix, and both C and Unix utilize several common perspectives regarding programming and application development.
Over the years, C has progressed substantially, with a long series of evolving national and international standards.
An important perspective throughout this development is that the C language began as a tool to help meet specific technical needs, but now is widely used internationally to support a wide range of technical applications. Conceptually, C relies on the programmer to supervise many low-level tasks, and this allows C programs to run quickly, with little overhead.
With its history, the C Programming Language was developed with some assumptions regarding a computer's operating system. In today's environment, such an environment largely is consistent with features built into Linux and Mac OS X systems. However, Windows operating systems, including Windows 10, come with a somewhat different model of computation and different basic features. As a result, computers based on Linux or Mac OS X can be utilize C programs directly—relevant run-time environments for C typically are available with little work when a machine runs either Linux or Mac OS X. For Windows operating systems, however, there is both bad news and good news:
The Bad News: Windows operating systems, including Windows 10, do not have built-in capabilities designed specifically for programming with C.
The Good News: Windows operating systems, including Windows 10, provide full capabilities for general computing, and various packages and environments are available for Windows 10 to enable programmers to work directly with C.
When working with Windows 10, a first step is to download/install appropriate packages that support C programming. With these tools available, program development in C can be reasonably straight forward. A programmer writes in C, and the behind-the-scenes packages provide a framework for program execution—the programmer need not worry much about most internal differences for C between Windows 10 and other environments.
As you may expect, numerous packages are available to support C programming within a Windows 10 environment. Pragmatically, most of these C environments provide fine support for commonly-used capabilities and libraries of the Standard C Programming Language (e.g., C99, C11, or C18, as mentioned above). Thus, many [most?] C environments for Windows will work fine for most or all activities related to most introductory courses involving programming in C. These environments may vary in their ability to run relatively advanced features of Standard C, but such capabilities generally arise only in applications beyond the scope of an introductory course.
In considering many of the packages that might be used to support C programming on Windows 10, most possibilities provide a general environment, and many seem designed for certain types of uses. However, each package may not work as well for other applications.
The following procedures focus on the installation of MinGW-w64. On the positive side, this package seems to provide an extensive range of libraries, including capabilities to utilize Bluetooth communication. On the negative side, the user environment may seem somewhat limited.
Note: The following comments and procedures largely follow Ross's Rambling: Installing MinGW-W64 + MSYS on Win 10 x64 (or Win 8.1 or Win 7). Throughout, this narrative adds notes and selects specific details—focusing upon likely needs for folks just beginning with C within a Windows' environment.
Although installation of an appropriate C programming environment requires several detailed steps, the high-level goals of these instructions yield three basic results:
C\:/msys
C:\MinGW-W64
MinTTY, will be available
for your work within the MSYS and MinGW-w64 environments.
Several widely-used programming environments are available for writing and running programs in C within Windows 10. All of the following provide solid, low-level control of the programming environment, as needed for this course. Variations typically relate to details of the underlying machines (e.g., computers that support 32-bit versus 64-bit processing), libraries that are available (e.g., the ability to utilize Bluetooth communication within a program), and the range of programming/operating systems commands available to a user.
Minimal GNU for Windows (MinGW) "provides a complete Open Source programming tool set which is suitable for the development of native MS-Windows applications." Further, MinGW includes, "MSYS, a contraction of "Minimal SYStem", [which] is a Bourne Shell command line interpreter system." Historically, this project has focused on capabilities for 32-bit computers, although programs built with MinGW also seem to run on 64-bit computers as well. While offering a solid environment for much C programming, this system does not seem to support libraries within Windows for Bluetooth communication between computers.
The Cygwin Project provides "a large collection of ... tools which provide functionality similar to a Linux distribution on Windows." That is, Cygwin provides an appropriate environment within Windows for many applications. As with MinGW, this environment provides support for much C programming, but does not seem to support Bluetooth communication.
MinGW-w64 (a Minimal GNU compiler for Windows with either 32-bit or 64-bit processors) provides language capabilities for several programming within Cygwin, including Ada, C, C++, FORTRAN, and Objective C. This project separated from MinGW in 2007 and provides a vast collection of libraries, including Bluetooth communication. However, its user-based capabilities may be somewhat limited.
The installation of MinGW-w64, MSYS, and related elements requires several steps. You will need to follow these instructions step-by-step. Do NOT jump ahead or skim quickly through this section!
C:\msys
or C:\msys64 is a reasonable choice. (I
used C:\msys64)
MSYS2-64bit.)
Throughout this discussion, the names of various packages and libraries are named in accordance with the underlying hardware. Thus, throughout,
mingw-w64-i686 if your computer uses a
32-bit processor. (This may or may not provide support for
Bluetooth communications, but likely will be fine for other activities.)
mingw-w64-x86_64, if your computer uses
a 64-bit processor.
These instructions are written for 64-bit computers, so the examples
use the previous mingw-w64-x86_64 For 32-bit machines,
change this prefix in commands to mingw-w64_i686.
Once MSYS2 is installed, the Windows "start" menu (at the bottom
left of your screen) will contain an entry
for MSYS2-64bit.
Clicking on this menu entry yields three options:
In all work that follows, you must use the MSYS2 MingGW 64-bit option.
Behind the scenes, MYSYS2 records what software development libraries and language packages are installed. Once the basic MSYS2 system is available, a first step is to install/update this infrastructure.
pacman
pacman -Syu
to update the package database and basic MSYS2 elements.
The
-S to synchronize the installed packages with an
extensive database maintained by MSYS2. The following flag options
are commonly used during these instructions.
-S: Synchronize—install a designated package
from the MSYS2 library repositories. Used in Step 4
below, pacman first determines what other packages are
needed for the specified package, and installation includes not only
the specified package, but also any packages it depends upon.
-Su: Update any packages that currently are out date.
-Sy: download a fresh copy of the master package
database, to be sure any local information about packages is up to
date.
-Syu: a combination of the -u and
-y optons
Installing components of MinGW-w64 for C programming within
MSYS2.
MinGW-w64 includes a staggering 1846 separate
packages that support numerous common capabilities and a
range of languages, including Ada, C, C++.FORTRAN, and
Objective C.
Within the MSYS2 Terminal window, install the packages that handle frequently-used elements within C, using the following MSYS2 commands. (If/when asked if you want to install many packages or just one, use the default which specifies all.)
      pacman -S base

      pacman -S base-devel

      pacman -S mingw-w64-x86_64-toolchain

      pacman -S mingw-w64-x86_64-libjpeg-turbo

      pacman -S mingw-w64-x86_64-glew

      pacman -S mingw-w64-x86_64-freeglut

      pacman -S mingw-w64-x86_64-hidapi
Note: In the above sequence, some people have observed that the installation of the toolchain times out, so that material is not installed, and the gcc compiler is not available. In that case, one might try installing just the gcc compiler, gcc libraries, and make utility:
   pacman -S mingw-w64-x86_64-gcc
   pacman -S mingw-w64-x86_64-gcc-libs
   pacman -S mingw-w64-x86_64-make
This option does not download various other tools, but at least an appropriate compiler utilities will be available.
With the basic MSYS2 environment established, packages for various languages can be installed.
base and code-devel packages
contain numerous capabilities that support much programming
activity. These packages likely are needed for whatever
programming you might do.
mingw-w64-x86_64-toolchain provides compilers and
libraries for programming in Ada, C, C++, FORTRAN, and Objective
C. This collection provides a fine environment for present and
future programming endeavors. However, this group of packages is
quite large. MSYS2 provides
a
detailed listing of the elements of toolchain/collection. If
one wanted to reduce the size of this group, one could install
only the desired packages (e.g., omitting the packages for ada,
fortran, libgfortran, and objc). To install the other packages,
use the command for pacman -S
mingw-w64-x86_64-toolchain, replacing the
word toolchain with the desired packages, such
as binutils, gcc, gdb etc.
mingw-w64-x86_64-libjpeg-turbo provides
capabilities for the storage, retrieval, and processing of
images in jpeg format.
mingw-w64-x86_64-glew provides basic image-handling
capabilities.
mingw-w64-x86_64-freeglut provides an
applications interface which handles several common tasks with
window handling and image display.
mingw-w64-x86_64-hidapi provides the proper
infrastructure for utilizing Bluetooth communications within a C
program.
The process of installing MSYS2 actually establishes three different
environments for working with programs—all found in the msys2
directory that you set up. (If you followed the instructions given
here, this directory would be in C:msys>
or msys64.)
In particular, the base MSYS2 folder contains three different shells (analogous to the bash shell, C shell, or z shell on Linux or Mac computers). Use one of these shells as your terminal window when working with various programming interactions and languages:
mingw32.exe for running programs in a 32-bit
hardware environment.
mingw64.exe for running programs in a 64-bit
hardware environment.
msys2.exe for running programs in a reasonably
generic environment.
When programming in a 64-bit computing environment (as is
highlighted throughout these instructions, you must
use mingw64.exe.
The other options likely will not able to find the proper libraries, compilers, and other needed utilities. (For example, using a different starting point caused me considerable frustration, until I realized my error.)
During the installation of MSYS2, the installer asked for the name of
an entry within the Windows start menu, so you would have quick links
to MSYS2. However, a close look at the start menu will show an entry
(e.g., MSYS2-64-bit), but that main entry has three subentries
(MSYS2 MinGW 32-bit, MSYS2 MinGW 64-bit and MSYS2
MSYS.
For programming in the desired 64-bit environment, only start
entry MSYS2 MinGW 64-bit should be used.
With this in mind, it is suggested that you install a link to this program on your task bar, and ignore the other starting options.
mingw64.exe, and right click to
obtain a menu of options.
eSpeak is a speech synthesizer package that allows the computer to read text that it is given. This capability turns out to be quite useful when testing programs. (When running a program, espeak allows the program to say what it is doing, so the programmer can watch that the robot is doing the right activity—without having to consult the code to determine what is supposed to happen next.)
To install eSpeak
Download the setup_espeak-1.48.04.exe executable file for Windows from eSpeak
Run the setup_espeak-1.48.04.exe program, to start an "eSpeak Setup Wizard".
To get started, personally, within msys2, I moved to the directory containing this program, and I typed:
./setup_espeak-1.48.04.exe
After the welcome page, the wizard asks what folder should be used
to install eSpeak. Although the default could be
used, C:\eSpeak is suggested, in order to be
consistent with the choices to be made for the MyroC package.
Whatever you decide, be sure to record the location in your notes, as you will need this information later for the MyroC/eSpeakPackage installation.
eSpeak comes with a separate app that allows you to type text and hear it spoken according to several parameters.
en) and American
English (en-us).
+m1, ...,
        +m7
), and five female voice variations (+f1, ...,
+f5).
A full voice specification combines a language and a gender
specification, such as en+m1
and en-us+f5.
In addition to the default option, you might choose four combinations of language and gender. (You will be able to experiment with various combinations shortly—as part of testing the installation of this package.
Windows 10 includes a "Start Up" menu to ease finding user applications. This menu oversees the inclusion of eSpeak on this "Start Up" menu. The default will be the directory specified in the first step of this Wizard process—feel free to accept this default.
Finally, review the earlier choices for this Wizard and click "Install", and then click "FINISH".
You can test that the installation of the basic eSpeak code has been installed properly in two ways.
The espeak package comes with an application, called TTSAppp.exe. You can run this in either of two ways.
            cd C:/espeak
            ./TTSApp.exe
The espeak package comes as a stand-alone program,
called espeak.
command_line subdirectory, and use
the espeak command:
          cd C:/espeak
          cd command_ line
          ./espeak.exe
When this program is running, type in text, and the program will speak the text to you, line at a time.
-v option. For example,
considering the voice combinations mentioned above, one
could type:
          ./espeak.exe -v en+m1
          ./espeak.exe -v en-us+f5
Notes:
The eSpeakPackage, distributed as part of MyroC, provides a C interface that allows a programmer to specify text to eSpeak within a program. Thus, a single C program will be able to control a robot and generate speech through the synthesizer at the same time.
To get started, you will need a base directory for downloading and
installing the eSpeak and MyroC packages. For example, you might
create a directory MyroCPackage for your work.
In a terminal window, move to the top of your MSys2 file structure,
create a MyroCPackage directory, and move to it.
cd                  # go to the MyroC home first
mkdir MyroCPackage  # create a base directory
cd MyroCPackage     # move to the base directory for MyroC installation
Download the compressed archive file, MyroC.a.tgz to your created base directory
Although the original file, MyroC.a.tgz, is a
compressed archive file, the Windows environment may or may not decompress the
file automatically during download.
Depending upon the file extension of the downloaded file, only one
of the following options will apply.
tar -xzvf MyroC.a.tgz
tar -xvf MyroC.a.tar
Note:
tar command, you may get a final
message:
tar: Exiting with failure status due to previous errors
If this message appears, scroll thorugh the listing of files
that tar has unpacked. Upacking the file
.../latex/index.pdf likely will create an error message
related to creating a "symlink to 'refman.pdf'". As it turns
out, Windows 10 does not support symbolic links. Thus, this
problem is expected and should not impact later work with MyroC.
If this is the only reported error reported, then unpacking
MyroC.3.3a likely has worked without meaningful trouble, and you can
proceed.
Following this extraction, the following files and directories should be found in a new MyroC.a subdirectory.
All materials for the eSpeakPackage are (not surprisingly) located in
the eSpeak directory.
Move from the general MyroCPackage directory to its
eSpeak subdirectory.:
cd eSpeak
The internal algorithms and code for the eSpeakPacakge are quite different on Linux, Mac OS X, and Windows 10. Thus, the downloading and decompression process for the MyroCPackage creates four subdirectories for the eSpeakPackage:
eSpeakExample1.c works directly with just the
eSpeakPackage. The other C programs, however, utilize both the
eSpeakPackage and MyroC, so they cannot be used until both of
these elements have been installed.)
Assuming a Windows environment, move from the main base directory to the new eSpeakPackage-windows.3.0 subdirectory. Then list the contents of the eSpeak subdirectory:
cd eSpeakPackage-windows.3.0
ls
The listing includes the following files:
Compile and install the relevant framework for compiling and running
eSpeak on a Windows computer by using the make:command
with the file Makefile-windows-installation-espeak:
make -f Makefile-windows-installation-espeak install/eSpeak
Notes:
Makefile-windows-installation-espeak assumes that
the eSpeak program (from Jonathan Duddington) was installed in
C:\eSpeak. If this is not the location chosen when
installing eSpeak from Duddington, then edit the
Makefile-windows-installation-espeak file to indicate the
correct place.
sudo make -f Makefile-windows-installation-espeak install/eSpeak
/usr/local/include and /usr/local/bin
If the "make" and "sudo make" commands generate the message, "no such file
or directory", then the above directories may not exist.
/usr/local/bin exist:
ls /usr/local/include
ls /usr/local/bin
mkdir /usr/local/include
mkdir /sur/local/bin
After compiling the eSpeakPackage (step 4), programs eSpeakTest.c and
eSpeakExample1.c can be compiled and run with the make
command and the application version of Makefile:
make -f Makefile-windows-apps eSpeakTest
./eSpeakTest
make -f Makefile-windows-apps eSpeakExample1
./eSpeakExample1
Note that the eSpeakExample1.c program provided in this eSpeakPackage distribution will not compile correctly until the MyroC package already is installed.
Installation of the MyroC package follows a process similar to what has been described for the eSpeakPackage—using the same MyroC download that was used for installing the eSpeakPackage.
cd              # go home first, since earlier commands reference various directories
cd MyroCPackage # the base directory for this installation
cd MyroC.a   # the subrelease subdirectory
As with the eSpeak installation, compile and install the MyroC package
in system directories using Makefile-windows-installation-myroc as the relevant
framework for compiling and installing the MyroC package:
Compile and install the MyroC package in system directories:
make -f Makefile-windows-installation-myroc install/MyroC
Note: As with the eSpeakPackage installation, if you encounter an
error message, "operation not allowed," when running
the make command, you should try
sudo make -f Makefile-windows-installation install/MyroC
This command will require you to type your password to confirm your intention to perform this command.
Often, the output of a printf statement will not appear
until late in program execution—perhaps just before the
program terminates. To solve this problem, add the statement
fflush(stdout); after each printf statement.
Several test programs are available in the test-programs subdirectory of the base directory.
Preliminary Step: Using MyroC with Scribbler 2 robots requires setting up Bluetooth so the workstation/laptop and robot(s) are properly paired. See Bluetooth Setup for Windows 10 Workstations/Laptops for details — before trying to run test programs.
Compiling MyroC programs requires use of numerous compilation flags, compiling normally uses a Makefile. As with installation, compilation flags must be tailored to the Windows environment.
Move to the MyroCPackage directory that you created earlier, and then
move to its test-programs subdirectory.
From the MyroC.3.3 directory, move to the test-programs subdirectory.
cd
cd MyroCPackage
cd test-programs
In the test-programs subdirectory, use the make command
with the Makefile-windows-apps file as the relevant
framework for compiling MyroC programs. For example, running
the spirit-song.c program utilizes these steps:
make -f Makefile-windows-apps spirit-song
./spirit-song
Although this command sequence should work without trouble, typing
-f Makefile-windows-apps for compiling every program
can be somewhat tedious and error prone. To simplify the compiling
process, make a copy of Makefile-windows-apps to a new
file Makefile
cp Makefile-windows-apps Makefile
With this step the make
command will use Makefile as its default. In this
context, one can compile and run programs with a simpler sequence:
make spirit-song
./spirit-song
Notes: Following this same approach, any MyroC application
programs may be compiled using the make
command—assuming file MyroC-windows-apps is
present in the current directory. (As already discussed, copying
MyroC-windows-apps to a Makefile file allows
a simple invocation of the make command.)
|
created 17 October 2015 revised 19 October 2015 revised 23 February 2016 revised for Windows 10: 31 December 2020 – 4 January 2021 revised 23-24 Aprl 2021 |


|
| For more information, please contact Henry M. Walker at walker@cs.grinnell.edu. |

| The MyroC project is Copyright © 2011-2021 by Henry M. Walker. |
|